


Interior Basement Waterproofing Toronto


Interior Basement Waterproofing Toronto
A wet basement in Toronto rarely announces itself with a flood. It starts with a damp smell you can’t quite locate. A faint stain at the base of the wall. Water that appears out of nowhere after a heavy rain, and disappears before you can show anyone.
If that sounds familiar, you need interior basement waterproofing: the most practical, cost-effective way to stop basement seepage, cove joint leaks, and hydrostatic pressure from inside your home, without excavating your yard or disrupting your landscaping.
Aquatech has installed interior waterproofing Toronto homeowners rely on since 1996, nearly 30 years protecting basements across the GTA. Over 50,000 homeowners have trusted us with their homes, every job comes with a lifetime warranty, and our price match guarantee means you’ll never pay more for the same protection elsewhere.
What Is Interior Waterproofing?
Interior waterproofing manages water from inside your basement rather than blocking it outside: a faster, less invasive way to stop seepage without excavating your yard. The system starts with a interior drainage channel along the base of your walls, connected to a sump pump that pushes collected water out and away from your home. Cove joint leaks and cracks are sealed, and a battery backup system keeps your basement protected even during a power outage. It’s the most practical fix for existing seepage, and it works well alongside exterior waterproofing for full protection.

Aquatech, Trusted for Over 30 Years


What Our Clients Have to Say
Basement Waterproofing Testimonials


-
 Rated 5 out of 5 stars
Igor and Anatolia installed a new sump pump and interior waterproofing after a basement flood. The crew worked efficiently, kept the area clean, and finished on schedule. Professional, knowledgeable, and fairly priced—would absolutely recommend.
-
 Rated 5 out of 5 stars
Vlad’s crew worked diligently and professionally to waterproof our foundation. They made sure everything was tidy and clean when they were done. Everything was very good from the beginning communication to get the quote until the very end. We highly recommend this company.
-
 Rated 5 out of 5 stars
Just had our house waterpoofed by Aquatech – fabulous job! They did exactly what was outlined to us … no surprises, which was wonderful. The workers on site, Igor and Anatoly, were amazing, very professional and detailed oriented. We had a couple of things that were out of the scope of the project and Igor went over and above resolving all issues beyond our expectations. In all, a very professional job and they tidied up after themselves – highly recommend!!
-
 Rated 5 out of 5 stars
Alex and crew just finished. They were quick and left no mess afterwards. Time will tell how the exterior waterproofing holds up but I’m hoping it’s good now!
-
 Rated 5 out of 5 stars
Alex & Alex dud an amazing job. Prompt, hard workers and kept everything as clean as possible. Looks great .than you.
-
 Rated 5 out of 5 stars
My basement sump pump room wall just below my outside stairs and veranda were wet when we had more than 1 inch of rain. I called Aquatech Basement Waterproofing, and assigned Eric to meet me and assessed the work to be done and provided a very reasonable quote, and the work was scheduled to meet my schedule. There were 2 crews of 2 men all from Ukraine, all very knowledgeable, professional and did a wonderful job. They protected the flooring from the my main doorway right down to the basement room where the work was being done. The first 2 man crew removed the Styrofoam from that was on the basement walls and ceiling, moved my battery backup sump pump and moved to a safe locatiion while working in a small area. They broke the concrete floor around the room down to the footings, which needed to be to add weeping tile. They cleaned the area as they worked, removed the concrete debris and then brought in the required material to install weeping tile. The second crew assisted with the installation of the waterproof membrane on the walls, install the weeping tile and cementing of the part of the floor where the weeping tile was installed and added to the sump pump basin. They reinstalled the light and light switch, wall plug outlet. This all was done in a few hours. I would highly recommend Aquatech as their staff are very knowledgeable and very efficient in doing their job. I would definitely use them again if I have any future for any basement Waterproofing, or water issues. Thank you so very much Dianne P. The were very professional s advised that I ca Eric came by promptly, assessed the situation, gave me a quote, very reasonable and scheduled
-
 Rated 5 out of 5 stars
Thanks to Andrew, Will, Vasyl, and Yuriy of Aquatech Waterproofing, I no longer panic when the weather forecast calls for rain. The four-man team applied interior waterproofing to a large portion of my basement in less than seven hours. They placed Dimpleboard on the walls, installed and covered new four-inch plastic weeping tile pipe and also backfilled, cleaned and cemented the entire work area. The crew was courteous, on time and professional. Company representative, Nico, who appraised the job before the work began, was also very knowledgeable and kindly answered all my questions. The cost was extremely reasonable and I have a transferable life-time warranty for their services. I highly recommend them.
-
 Rated 5 out of 5 stars
Aquatech Project Consultant Richard responded ultra-quickly to my call for an estimate on 2 cracks on the inside of my basement foundation wall, visible only after I removed panelling & insulation & only when it rained heavily & water was pouring through those 2 small cracks. Richard impressed me with his assessment expertise & the speed at which he provided the best quote & solution for my leaks & my budget as a retiree on a fixed income. The repair on the outside wall with weeping tile replacement & utilities locates was scheduled & communication with Rita in the office & follow up with Richard was excellent. The day of the repair, Water Proof Technicians Vasyl & Yuriy arrived on time & ready to work. They were totally professional, polite & prepared with expertise & the right equipment to complete the task. They impressed me to no end with their work ethic & support for each other rotating in & out of the trench to get down to the footings. They installed the new weeping tile, cleaned the foundation wall & revealed 2 very long cracks which they V cut and repaired with hydraulic concrete. The rest of the process was their standard applications of Aqua Block, fibreglass mesh, another layer of Aqua Block, a layer of Poly-tarp, & a Dimpleboard membrane installation. They back filled the trench & cleaned up the area to perfection. Aquatech is blessed to have Vasyl & Yuriy as employees – thorough & meticulous. They are 12 out of 10 in my opinion!!! Note: 2 of my neighbours were impressed & asked for Aquatech’s phone number from me. Thank you Richard, Rita, Vasyl & Yuri.
-
 Rated 5 out of 5 stars
Aquatech consultant, Shawn McGirr, investigated my water problem and provided a realistic and cost effective solution. A few days later Bob and Alex arrived to do the work. They both worked very hard and were efficient and clean. They completed an incredible amount of work in a very short period of time and left the worksite as clean as it was before they arrived. I’m confident that the issue has been resolved and comforted by the lifetime warranty.
-
 Rated 5 out of 5 stars
Alex, Eugene, Mike and Igor did an amazing job with my basement waterproofing project. They were very personable, very hardworking and very efficient. I was very pleasantly surprised how quickly they finished the job. Everything was cleaned up and put back in order when they were done. I definitely recommend Aquatech Waterproofing. From my first meeting with Tony to discuss the project, I could tell they were the right choice
How Much Does Interior Basement Waterproofing Cost in Toronto?
Interior waterproofing Toronto homeowners typically pay $69 to $190 per linear foot, depending on the length of wall needing drainage, the condition of your existing cove joint, and whether a new sump pump is required. A standard sump pump installation runs $550-$3,650 on its own if you don’t already have one. Since interior waterproofing doesn’t require excavation, most jobs cost less than exterior waterproofing and finish faster. Contact Aquatech for a free, itemized quote, our price match guarantee ensures you’re never overpaying for the same protection.


Why Choose Aquatech Waterproofing For Interior Waterproofing
With over 30 years of experience, Aquatech Waterproofing is a trusted specialist in interior waterproofing services across Toronto and the GTA. We’ve helped thousands of homeowners stop basement seepage for good: without excavation, without disrupting your yard, and always backed by real guarantees, not just promises.
✦ Lifetime warranty
✦ No excavation or yard disruption required
✦ Serving 50+ communities across Ontario
✦Price match on any licensed competitor’s quote
✦ Free on-site inspection
✦ Flexible financing available
✦ 10-time HomeStars Best of Award winner
✦ 50,000+ Happy Customers
Our Interior Waterproofing Best Offers
Price
Match Guarantee
Get a lower quote from any licensed Ontario waterproofing contractor and Aquatech will match it: same scope, same materials.

$300 Off
Waterproofing Services
Save $300 on interior waterproofing projects over $12,000, ask your estimator to apply the discount at your free consultation.
lifetime
transferable Warranty
Enjoy peace of mind with long-term protection. Our systems are built to last and fully backed by warranty.


FINANCING AVAILABLE
IN Toronto


What’s Causing Water in Your Basement?
Water enters Toronto basements through a surprisingly small number of entry points. Knowing which one you’re dealing with tells you what solution you actually need.
Cove Joint Leaks, The Most Common Culprit
The cove joint is the seam where your basement floor meets the foundation wall. Because concrete is poured in separate stages during construction, this joint is never fully monolithic, there’s always a slight gap. As groundwater saturates the soil around your foundation and hydrostatic pressure builds, water finds this gap and seeps through.
Signs of a cove joint leak:
- Water appears at the base of the wall, right where it meets the floor
- The leak is a line along the perimeter, not a crack in the middle of the floor
- It happens during or after heavy rain, or during spring snowmelt
- The area dries out between rain events
Read our full guide on cove joint leaks →
Hydrostatic Pressure, The Invisible Force
Hydrostatic pressure is what happens when water-saturated soil pushes against your foundation walls with increasing force. Toronto’s clay-heavy soil absorbs and holds moisture for extended periods, meaning the pressure against your foundation doesn’t disappear when the rain stops. It builds gradually, and eventually forces water through the smallest crack, gap, or porous section of your foundation wall.
Interior waterproofing relieves this pressure by giving water a controlled path to drain before it can force its way through.
Foundation Wall Seepage
Poured concrete and concrete block foundations are both porous materials. Even without visible cracks, water can migrate through the concrete itself when hydrostatic pressure is high enough. You’ll notice this as:
- Damp patches on the wall that don’t correspond to any visible crack
- A white, chalky residue called efflorescence , mineral deposits left behind as water evaporates through the concrete
- A persistent musty smell even without visible moisture
What is efflorescence and what does it mean? →
Floor Cracks and Floor Seepage
Water under sufficient pressure rises upward through the path of least resistance: which can be cracks in your basement floor, or the floor-wall joint itself. If water appears on your basement floor but your walls look dry, sub-slab pressure is likely the cause.
Why is your basement leaking from the floor? →
Window Well Leaks
Below-grade windows with poorly drained or debris-filled window wells are a common and often overlooked source of basement water. When a well fills with rainwater or snowmelt, water pushes directly against the window frame and frame seal. Window well installation →
Tie Rod Holes
If your home has a poured concrete foundation, horizontal tie rod holes, used to hold the concrete forms in place during construction: are common leak points. Over time, the plugs that fill these holes deteriorate, creating direct water pathways through the wall.
Interior Waterproofing and Toronto’s Rebate Programs
Depending on where you live in the GTA, you may be eligible for municipal rebates on sump pump installation as part of your interior waterproofing project.
City of Vaughan: Up to $750 toward backwater valve installation, per the City of Vaughan’s program page
City of Toronto: Up to $2,250 toward sump pump installation, plus an additional $300 for battery backup, under the expanded Basement Flooding Protection Subsidy Program (BFPSP): increased city-wide as of May 1, 2026
Peel Region (Mississauga, Brampton, Caledon): Up to $1,500 toward backwater valve installation, confirmed directly with the Region


Interior Basement Waterproofing Toronto Process
Every basement leaks differently, so every job starts with a full inspection to find exactly where water is entering: whether that’s a cove joint, a foundation crack, or seepage through the floor itself. From there, we install a complete interior drainage system: a channel along the base of your walls connected to a sump pump, with a battery backup to keep it running through a power outage. Here’s how the full process works, step by step.
1. Excavating the Trench for the Weeping Tile
Concrete and flooring around the perimeter will be broken down, and debris will be cleared out from the area. This will allow Aquatech to excavate the interior of your home with a trench that is not too deep but also allows us to install the weeping tiles into the hole.

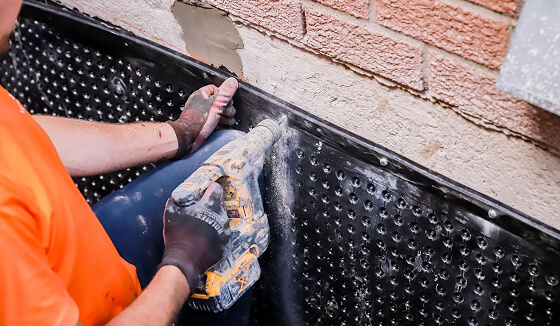
2. The Wall is Drilled for Holes
In the walls, holes are drilled which serve a specific function, this will allow the water that is trapped to be easily drained away to allow drying.

3. Wall Cracks are Fixed
Cracks or gaps in the basement walls are repaired and in many cases this will only require a water-tight sealant. If the gaps or cracks are large, Aquatech will use hydraulic cement in order to restore the wall integrity and ensure that anymore water does not get through.

4. Installing the Delta Membrane
For the walls, a delta drainage membrane is applied which stops any water, dampness, or mold from getting into the interior of the building. This helps water to flow away into the weeping tile draining, and supporting pump systems.

5. Installing the Sump Pump
Connecting into a sump basin, the weeping tiles allow water to flow. When this system activates, the water will flow into a pump, and will be pumped outside of your home to be releases into a different location away from the home.

6. Installing the Basement Weeping Tile
The weeping tiles are placed and installed, which are high quality piping modules that allow water to divert away from the home.
7. Laying Down the Cement
To flesh out and level the basement, concrete is poured. Aquatech will ensure a tidy cleanup around the area in order for your basement to be dry, clean and ready to be occupied again.
8. Customer Satisfaction
Aquatech Waterproofing prioritizes your happiness and ensures you are satisfied with your results. We promise clear communication and deliver a high-quality result. Trust us for a dry, and protected basement that exceeds expectations.
Here are 3 benefits of Interior waterproofing your home:
01
No Excavation, No Yard Disruption
Interior waterproofing works entirely inside your basement: no digging, no torn-up landscaping, no disturbed walkways or gardens. Your yard stays exactly as it is while your basement gets a complete drainage system and sump pump working underneath the surface.
02
Faster Installation, Less Disruption to Your Home
Most interior jobs are completed in days, not weeks, since there’s no excavation or weather delays to work around. You get a dry basement back in use faster, with minimal disruption to your daily routine.
03
Works Year-Round, Regardless of Weather
Frozen or waterlogged ground can delay exterior work for months. Interior waterproofing is installed entirely indoors, so it can be done in the dead of winter or the middle of a rainy spring with zero impact from outside conditions, including a battery backup to keep it running through any storm.

Interior vs. Exterior Waterproofing Services
If you’re dealing with a wet basement, the fix comes from one of two directions. Interior waterproofing, what this page covers: manages water once it’s already inside, using drainage and a sump pump to move it back out, without any excavation.
Exterior waterproofing stops water before it reaches the foundation at all, but requires digging around your home. Interior runs $69-$190/linear ft; exterior runs $90-$280/linear ft. If your basement floods severely or repeatedly, combining both methods often gives the most complete protection.
| Interior Waterproofing | Exterior Waterproofing | |
|---|---|---|
| How it works | Manages water after entry; redirects it to a sump pump | Blocks water at the source, outside the foundation wall |
| Where the work happens | Inside the basement/crawlspace | Outside, around the foundation |
| What’s involved | Drainage system, sump pump, vapour barriers, interior sealants | Excavation, crack repair, waterproof membrane, new weeping tile |
| Disruption | Minimal, some interior finishes may need removal | Higher: landscaping, decks, or walkways may be temporarily disturbed |
| Cost | $69-$190/linear ft | $90-$280/linear ft |
| Timeline | 1-3 days | 3-5 days (varies with excavation scope) |
| Maintenance | Ongoing, sump pump and discharge line need periodic checks | Minimal once installed |
| Best for | Managing existing seepage, tighter budgets, limited exterior access | Permanent prevention, severe or recurring leaks, homes with accessible foundations |
FEATURED WATERPROOFING PROJECTS
Discover Our Completed Interior Waterproofing Projects
From cove joint leaks to full interior drainage systems, Aquatech has completed interior waterproofing projects across Toronto and the surrounding region, sump pump installation, drainage channels, and everything in between. Every project reflects the same standard: a proper diagnosis, quality materials, and lasting results backed by a lifetime warranty. Browse real projects below to see the kind of work homeowners trust us to deliver.

Interior Waterproofing in Mississauga

Interior Waterproofing in Toronto

Interior Waterproofing in Kitchener

Interior Waterproofing in Scarborough
